Adding a playable main character, an "Explorer" to the game is almost identical to the creation of a normal, recruitable character. So if you want to add an Explorer, make sure to follow the Tutorial for adding a character until (and including) the section "Testing and adding a minisprite".
 |
To make it simple, we'll just completely base this example on the created Assisant character and make a variation of it that is a playable Explorer. What you should have to start is a basic character definition, a portrait/face, a sprite and a minisprite. You can keep all the entries of your imageData section, however, we'll have to do some adjustements to the character defintion in the modEntries section. Let's do this step by step.
Adjust character settings[]
First, let's change the id prefix and add a description:
{
id: sp-scientificAssistant
title: txt-pl-scientificAssistant-title
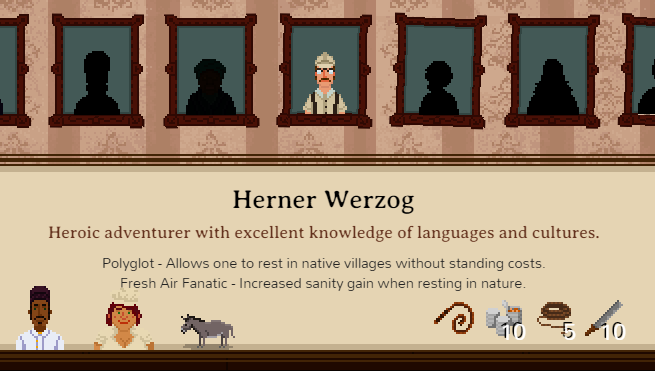
description: txt-sp-ee-adventurer
}
It is important to note that we changed the id prefix from pl-scientificAssistant to sp-scientificAssistant. By using the sp prefix the game knowns that your character is going to be an Explorer (sp stands for Special Character). Next, we'll need to add a description. All Explorers need a description that will be shown in the explorer selection menu. For the sake of simplicity, let's choose an existing generic description text. Of course you can add your custom text by adding an entry to your lang_en.csv just as with any other kind of text.
Next, let's add some more basic things:
flags: +special +humanoid
health: 8
capacity: 2
You'll notice that we've removed the flag +porter and replaced it by +special. This is used in various checks throughout the game. As usual, health and capacity can of course be modified to tune your character to your liking. For advanced users I recommend to extend the sp-base instead of adding these standard flags.
Now add a debugCategory if you haven't already, a name and the character unlock requirement:
debugCategory: Modding
name: "Herner Werzog"
alwaysUnlocked: true
Instead of referencing to a namepool as we did in the character tutorial, we now define a set name for this character. It's a bit of a shortcut and can be of course replaced by using an existing namePool or create a custom namePool for your explorer if needed. By adding alwaysUnlocked:true the character will be immediatelly available when starting a new game without any unlock requirements. If you want to learn more about unlock requirements, take a look at some of our [locked Explorers].
Next, as with normal characters, add a variations entry to define the images and gender used for your Explorer:
variations: [
  {
    gender: male
    sprite: sprite_1
    portrait: face_1
    miniSprite: miniSprite_1
  },
]
The last basic addition is levels. This is similar to levels of a normal character, but typically Explorers have only one defined level, as the gained Perks in additional levels will be defined by which perk is picked when returning from an expedition. That being said, technically you can indeed add more perks or dice just as if it would be a normal character, so feel free to experiement.
levels: [
  {
    statuses: st-scientificAssistant-4
    dice: dc-support-2 dc-support-2
  }
]
Your mod.hjson should look like this now (without the obligatory modInfo section):
{
 imageData:[
   {
     id: mod_preview
     file: scientificAssistant/mod_preview.png
   }
   {
     id: sprite_1
     file: scientificAssistant/sprite_scientificAssistant_1.png
   }
   {
     id: face_1
     file: scientificAssistant/face_scientificAssistant_1.png
   }
   {
     id: miniSprite_1
     file: scientificAssistant/minisprite_scientificAssistant_1.png
   }
 ]
 modEntries:[
   {
     id: sp-scientificAssistant
     title: txt-pl-scientificAssistant-title
     description: txt-sp-ee-adventurer
     flags: +special +humanoid
     health: 8
     capacity: 2
     debugCategory: Modding
     alwaysUnlocked: true
     name: "Indiana Jones"
     variations: [
       {
         gender: male
         sprite: sprite_1
         portrait: face_1
         miniSprite: miniSprite_1
       }
     ]
     levels: [
       {
         statuses: st-polyglot st-natureSanity
         dice: dc-support-2 dc-attack-2
       }
     ]
   }
 ]
}
Add characters and items[]
 |
Now let's add two additional entries to the character definition which are typically unique to Explorers:
characters: pl-trader pl-cook anm-donkey
items: {
  it-whip:1
  it-tinCans:10
  it-rope: 5
  it-machete: 10
}
As you may already have guessed the characters will define the standard starting trek members, and the items the starting items of your Explorer. Feel free to experiment and come up with unique combinations to give the gameplay of your Explorer an unique starting spin.
Mounted Sprite[]
Unlike normal character, Explorers can mount pack animals. Therefore you'll need to create a special variant of their sprite for the mounted state. We have described the necessary steps for this for animals already in the pack animal tutorial. This time, let's do it for the Explorer.
| First, download the template artwork for a mounted sprite, which is located in the file template_porter_artwork.png. Notice the pink pixel with the color #ff009c. This pixel is required for the placement of your mounted sprite on the saddle of the pack animal. While you can freely place the pixel to align your character with the saddle of the animal, it is required to have the exact color #ff009c. | 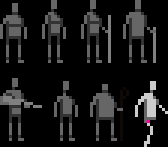 |
| Next, create your mounted sprite based on your original sprite artwork and the template image as a reference. Don't forget the #ff009c pixel. | 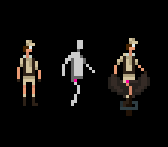 |
| Now, save the mounted sprite with the same name that you used for the normal sprite, with an added _mounted at the end. In the case of this example, the filename would be sprite_scientificAssistant_1_mounted.png. The size of the image can be the outer limits of your mounted sprite. | 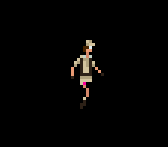 |
To finish your mounted sprite, add it to your imageData section like this:
{
  id: sprite_scientificAssistant_1_mounted.png
  type: slotted
  file: scientificAssistant/sprite_scientificAssistant_1_mounted.png
}
Note that you won't need to hook up the id of the image in the character definitions variation entry. Because of the special status of this sprite, it will automatically be used. This, however, requires that you name both the id and the file identical to the original sprite name with the added _mounted at the end.
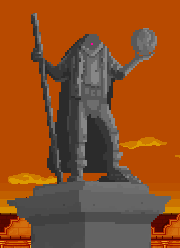
End Face[]
As people will be able to win the game by playing your Explorer you need to add a special variation of the face for the final stone statue image. First, download the menu.png image file that contains the headless stone statue of the final screen.
 |
 |
 |
 |
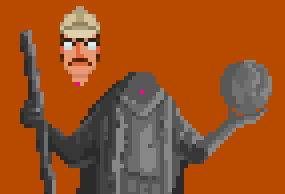
Now, add the new _end face to your imageData section:
{
  id: face_scientificAssistant_1_end.png
  type: slotted
  file: scientificAssistant/face_scientificAssistant_1_end.png
}
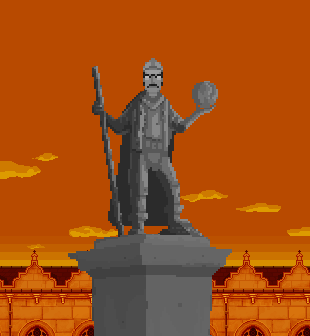
That was the last step. Your playable Explorer mod is now finished.
 |